17.03.2026
Time to read:
9
min
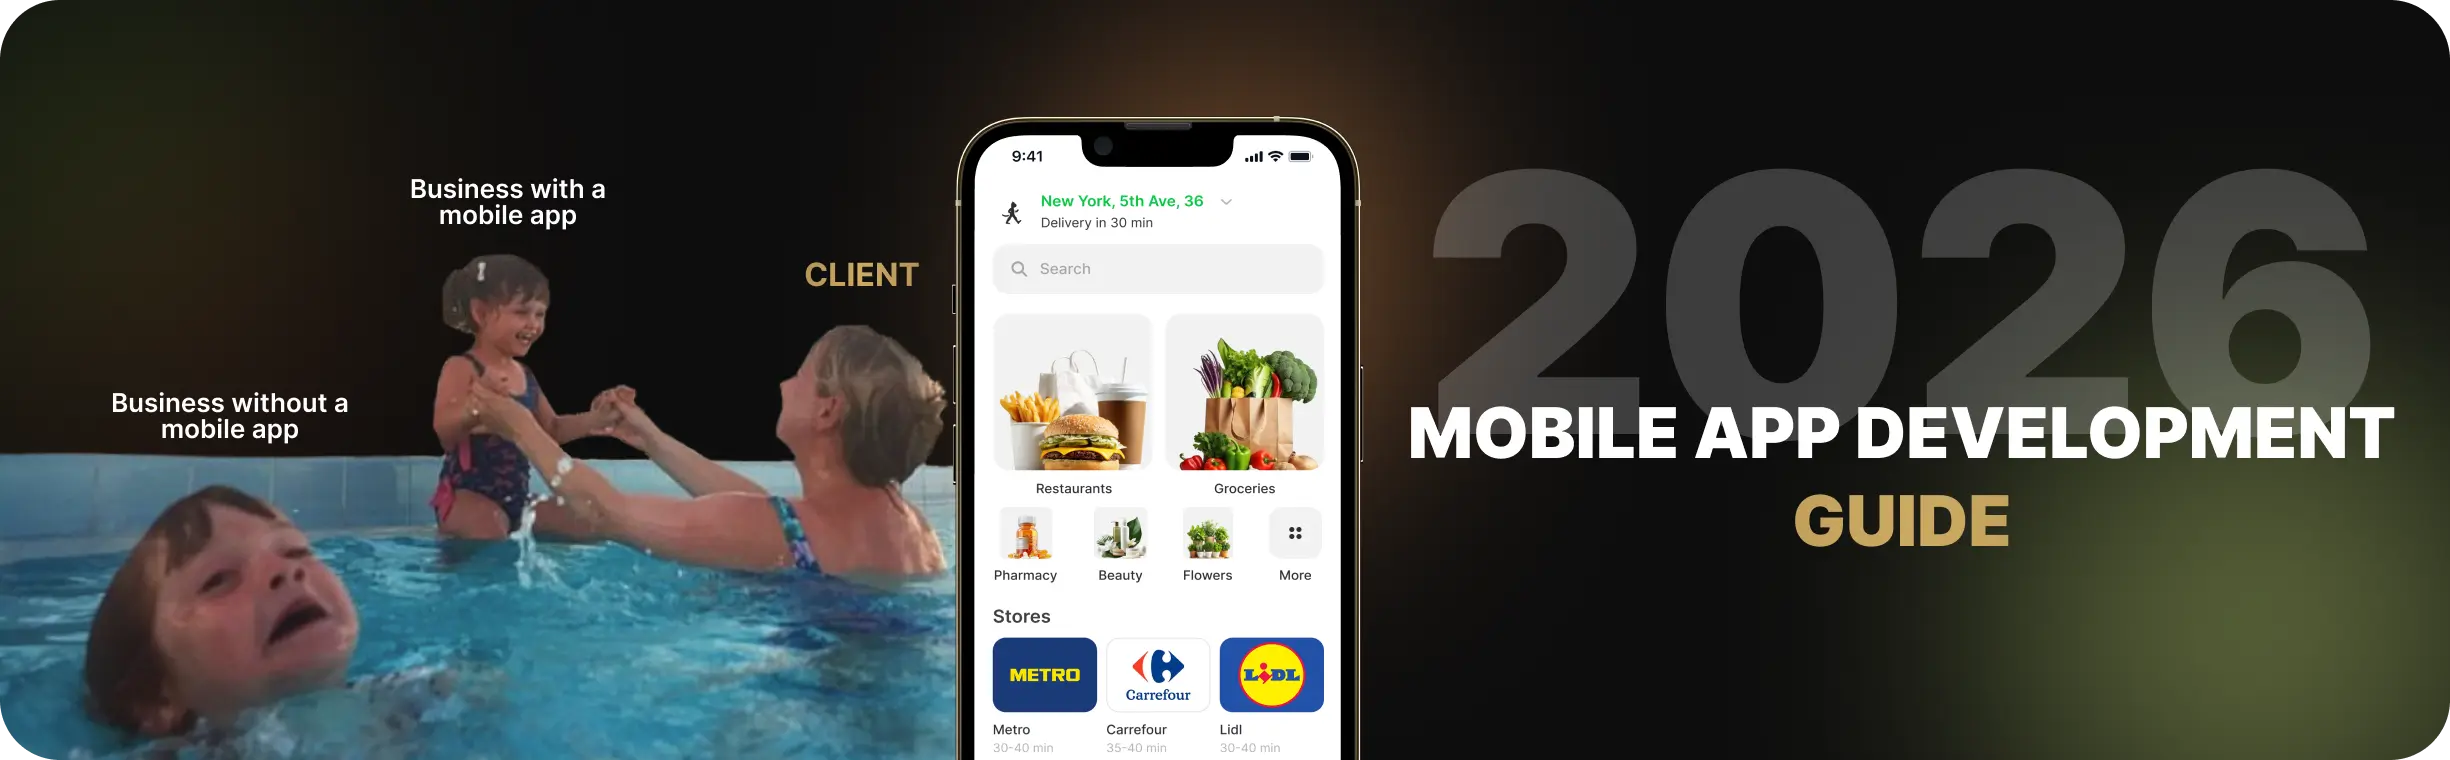
How to build a mobile app from scratch in 2026: the ultimate development guide
Guides
Development
If you are thinking about how to create a mobile app for business, but don't know where to start, read the article to the end. We'll tell you how to create a phone app from scratch — from idea to publication on the App Store and Google Play.
Why is this important? The world is rapidly going online. Today, more than 80% of users prefer to interact with businesses through apps. This means that this is no longer a sign of a high level, but a need.
Let's look at each step:
- How to understand what your customers need.
- How not to do too much and not miss out on important things.
- How to create an app that will bring you income and convenience for users.


Determining the goal of the project and studying the target audience
Before you start creating an app for Android and iOS, it's important to answer the main questions:
- Why do you need a mobile app?
- What is the goal of this project?
This may see obvious, but without a clear understanding of the task, the project runs the risk of becoming useless; it will not bring your business the profit you expect to receive.
Think:
- Do you want to improve customer engagement? For example, to enable you to order your services or products through the app, not just through the website.
- Or do you want to automate the company's internal processes: reduce the time spent on solving problems, and simplify document management?
- Or maybe your goal is to enter a new market or strengthen your brand?
To determine your goal, we recommend starting with three simple steps:
- Write down your business's main problems.
- Consider how a mobile app can help you solve them.
- Assess how this will benefit your business and customers.
For example, if you're a café owner, the app might include an online menu and the ability to book tables. And if you run a logistics company, the app can automate cargo delivery and tracking.

By clearly understanding the purpose of creating an application, you will save time, money and nerves. You don't have to constantly redesign the product to meet new challenges.
The next step is to find out who you're doing this for.
It is important to understand here that the application should be useful, convenient, and should also solve the audience's real problems.
The first step — Determine who your users are.
- These could be current customers who already know about the company.
- A new audience that is just getting started with your brand.
- Company employees, if the product is focused on internal processes.
The second step — study their behavior. Ask yourself:
- What do users expect from the product?
- What pains or discomforts do they have that can be addressed?
- How do they use mobile apps? For example, do they prefer simple interfaces or, on the contrary, functional and rich ones?
To do this, you can conduct surveys, collect customer feedback, or study site and social media analytics. The more you know about your audience, the more accurately you'll be able to satisfy them.
For example, if you own a fitness club, customers might be looking for a convenient way to book workouts. Or, if you have an online store, users want easy access to the catalog and a quick purchase option. This will be easier to achieve with the application than with the site, since the user always has the phone at hand.
Understanding your audience is like a map that helps you write an app tailored to their needs. Without it, you run the risk of getting lost in the development process. Now go one step further and see what the competition has to offer.
Competitor analysis
So, we figured out the goal and the audience. Now pay attention to the competition. Analyzing competitors is like studying your neighbors: you find out what works for them and what doesn't work for them, and it's better to leave this out.
Why is this important?
Because competitors have already spent resources to understand what users need. You can learn from your successes and, most importantly, from your competitors' mistakes.
Competitor analysis:
- Download several competitors' apps.
- Explore the functionality: what they offer, how it works.
- Read reviews on the App Store and Google Play. Users often write about what they like and what they don't like.
And here's what you can find:
- It may be that registration in a competitor's app is too complicated.
- Or, on the contrary, there's a handy feature you should add as well.
- Or maybe the design isn't user-friendly — it's a chance for you to stand out!
Tip: Make a list of competitors' strengths and weaknesses. This will help you understand which chips to borrow and which ones should be avoided.

After analyzing your competitors, you will understand how to make the app better. And this is half the battle! Now it's time to move on to creating the first ideas — prototypes.
Application prototyping
So, the goal has been defined, the audience has been studied, and the competitors have been analyzed. Let's move on to the first visual step — prototyping.
What does this mean?
You create a draft version of the project (or so-called “mockups”) to see how it will look and work.
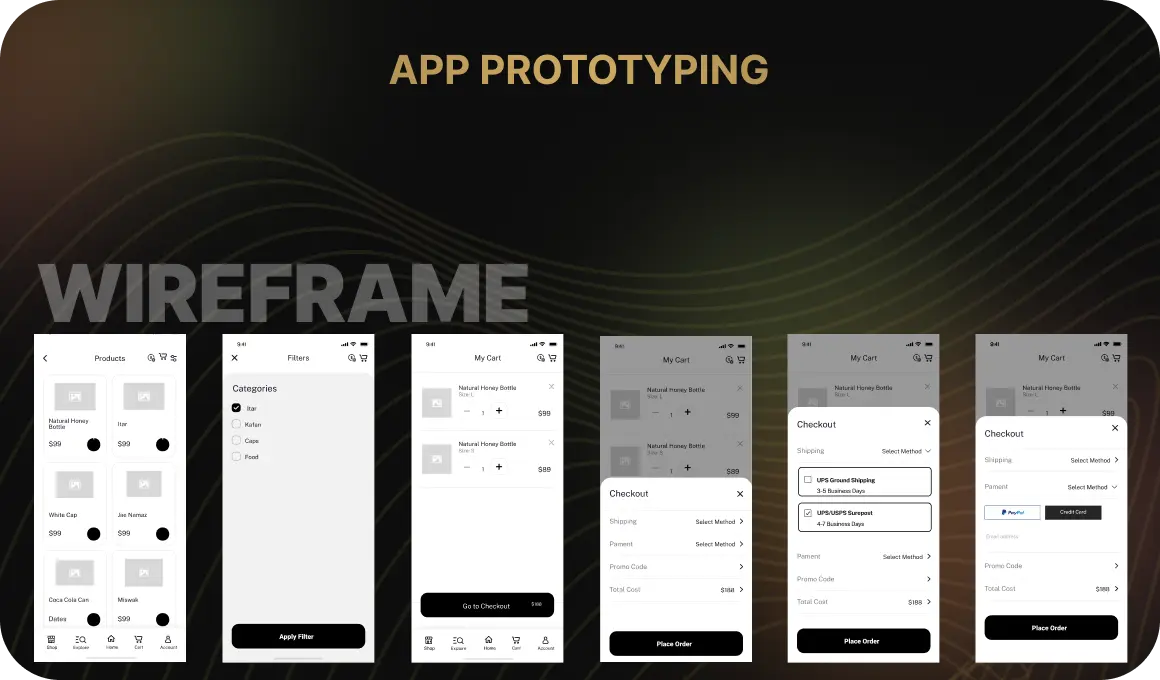
A prototype is like an artist's sketch. You are not creating the final masterpiece, but you already understand where and what will be located. For example, where to place the order button, what the menu will look like, how many blocks it will include, and what screens are needed for the application to work.
You don't have to be a designer or programmer to make a prototype. Today, doses of tools are available, such as Figma or Sketch, that help you quickly sketch an interface even without programming experience.
Here's what's important to consider during the prototyping phase:
- Simplicity. The interface should be intuitive, without overloading details.
- Logic. Consider how the user will navigate between screens. The path from opening a program to solving a problem should be as short as possible.
- Convenience. Try walking through the prototype yourself. Are you comfortable?
The prototype is not only about appearance, but also about functionality. Imagine a customer opening an app: what steps will they take? Where can you get confused? All of this can be tested at this stage.
Prototyping is a step that will save resources in the future and will allow you to test the concept in advance. Creating an app will be more efficient. It is better to fix errors at the initial stage than to rewrite the finished code later.
Looking ahead, let's share a little secret with you: you don't have to prototype the project separately for Android and separately for iOS. Create one interface, fill it with all the necessary elements, use tools that are convenient for you — all this saves time and money. Build one prototype for both platforms — and you don't have to spend money on two development teams — for Android and iOS.
Now that the prototype is ready, it's time to move on to the next stage — design.
App design
Design is a stage that turns a schematic sketch into a beautiful and functional product. This is the face of your project, what the user sees first.

Design is not only about beauty, but also about convenience. Good design makes interacting with the app easy and enjoyable. For this to work, it's important to remember a few key points.
The first — a single style. Fonts, colors, icons — everything should be in harmony. If your brand uses blue and white colors, for example, these same shades should be present in the design. This is how recognition is created.
The second — minimalism. Do not overload the screens with unnecessary elements. Remember: the user needs not only to admire the design, but also to quickly solve their problems.
Third — adaptation. Your product should look and work great on both large tablet screens and smaller smartphones.
Good design is not only beauty, but also convenience, which is especially important for successfully creating a mobile app. And now that the design is ready, you are already close to the most interesting part — the technical stage! This is where your product will turn from a mockup into a valid model.
But before that, one more important choice must be made.
The choice of technology and platform
Now that you have a clear idea of what exactly should be in your application, the crucial moment comes — choosing a technology and platform. This is a step that affects how the application will work, how fast it will develop, and how much time and resources you will spend on development.
The first thing you need to decide is what platform are you developing your mobile app for: iOS, Android, or both?
This is where development technology comes into play. If you're thinking about creating a mobile app for both platforms, consider cross-platform solutions like Flutter, React Native, or Xamarin. Choosing the right technology speeds up the creation of Android and iOS apps and reduces costs.

But if you need optimization for each platform, choose native development — separate for Android and iOS. This gives you more control over the app, but it will take longer and be more expensive to create.
It's also important to think about your future. Choose a technology that is scalable. For example, Firebase for data storage and analytics or Supabase for the backend will provide flexible and easy integration. This will help the project grow and adapt to changes.
There are many technologies that are suitable for different tasks, and it is important to choose the one that will be most effective for your project.
Don't forget about the budget and deadlines. We always recommend starting by analyzing what features the app should have and choosing a technology based on this. This will help you avoid unnecessary costs and speed up the process.
App development
So we got to the most technical stage — the development of a mobile application. This is a process where design and ideas turn into a working product.
Mobile app development considers of two key parts: the frontend and the backend. These two components work together, and each of them plays an important role.
The frontend is what the user sees and interactions with. These are buttons, screens, animations, i.e. everything that makes the product convenient and understandable. Simply put, the frontend is the “face” of your project.
But the backend is what's going on behind the scenes. This is the brain that stores data, processes requests, and sends responses. The backend is responsible for ensuring that the application is stable and fast. It supports all functions that take place “inside”.
For the app to be cheerful, user-friendly, friendly, and beautiful, it's important to choose the right technologies for both parts.

If you're wondering how to create a mobile app yourself that will run on iOS and Android, then Flutter is great for cross-platform development. This allows you to develop one program that works equally well on both platforms, saving time and resources.
When deciding which technologies to use, keep in mind that in order to have a high quality project, you need to balance both the frontend and the backend, as well as identify the appropriate tools for each part.
At this stage, it is important to work closely with developers. Discuss each step: what features should be in the first version of the project and which ones can be left for later.
Start with a minimum viable product (MVP). This is a version of the app that includes only the most important features and essential content. It's faster, cheaper, and allows you to collect first user reviews.
Development is the stage where your project comes to life. Although this is a complex process, proper planning and control will make it as effective as possible.
Testing and fixing bugs
Your app is ready. Look at it and think: Hooray, you can launch it! But don't hurry. Before you show it to the world, you need to test it.
Testing is testing development for errors, usability and reliability.
The goal is simple: make sure everything works as intended and doesn't annoy users. Here are three important points to pay attention to:
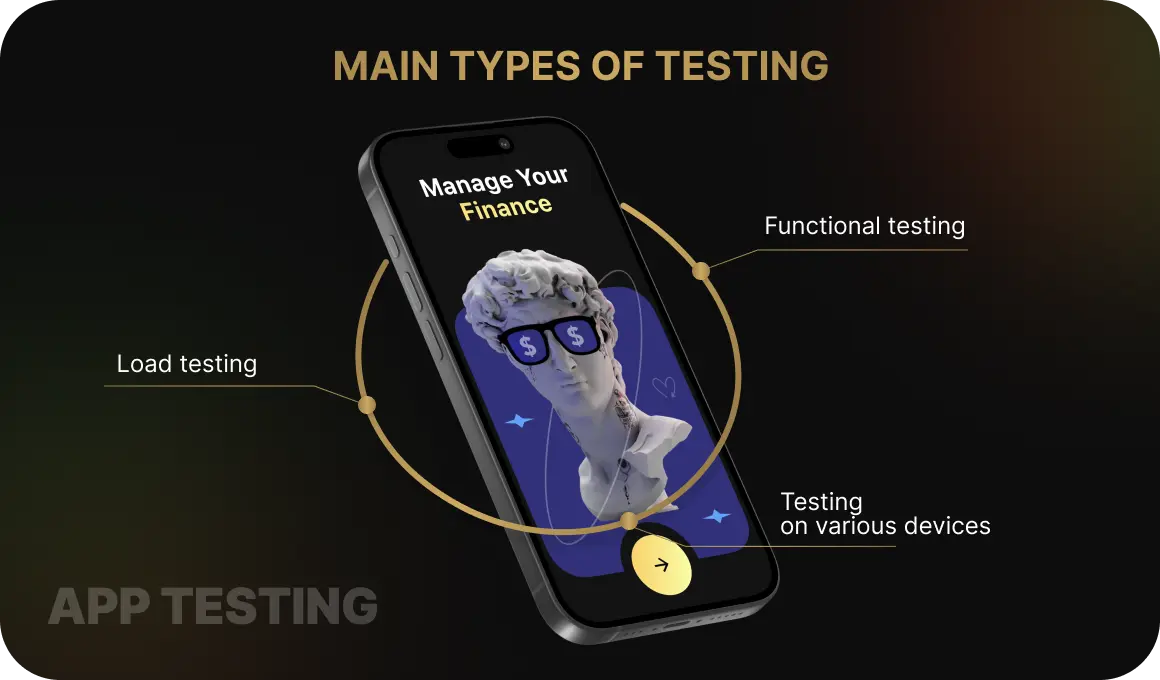
The first is functional testing. Check out all features:
- whether the user is registering;
- whether orders are shipped correctly;
- whether images are loading.
The second is testing on various devices. Smartphones are different: small, big, powerful, not so much. Your app should work equally well for everyone.
The third is load testing. What happens if, for example, a thousand users or ten thousand log in at the same time? The app should be able to cope
You can do the testing yourself or outsource it to professionals. It is important that at this stage all bugs and shortcomments are identified before the product is launched.
The main thing to remember is that testing is not a waste of time, but an investment in your product's reputation. It is better to identify problems in advance than to face negative reviews and loss of customers later.
The application has been tested, bugs have been identified, and now it's time for another important job — fixing bugs. This is the moment when all identified issues are addressed so that your product runs smoothly and smoothly.

Bugs aren't the end of the world. Don't be scared. Bug fixes are an important part of creating mobile apps. Even the most popular projects make mistakes, especially at the start. The main thing is to eliminate them in time.
Bug fixes are not just about fixing minor bugs, they are working on stability and reliability. What you should pay attention to:
- Critical bug fixes. These are bugs that can fully block the program from working. For example, the inability to register or broken buttons.
- Performance improvements. If the app is slow or takes a long time to load, this should be fixed before release.
- Minor but important improvements. These errors do not interfere with functionality, but can be annoying for users: for example, buttons are not displayed correctly or fonts do not match.
The process of correcting defects should be quick and systematic. It is important that the development team carefully checks each patch and does not create new problems in place of the old ones.
In the end, the moment comes when the bugs are fixed, and the product starts to work smoothly and stably.
Releasing the app to stores
The release of an app on Google Play and the App Store is the long-awaited moment when your hard work and efforts begin to pay off. But before you hit the Submit button, slow down a bit. There are still a few important steps to consider.
The first is preparing meta-information. You need to add a description, screenshots, a video presentation of the product, keywords. This way, users will find your product faster and immediately understand what it is about and whether it is useful for them. We also recommend that you stop using templates — be unique!
The second is setting up analytics. Before starting the project, connect data collection tools such as Google Analytics or Yandex Metrica. This will help you track user reactions and quickly respond to any issues.
The third is compliance with all requirements and standards. Each app store has its own rules, and it's important to comply with them. For example, the App Store checks whether the app complies with security, privacy, and user experience recommendations.
After the application is sent, all that remains is to wait for the test results. This may take several hours or several days, depending on the specific site and the complexity of the project. Please be patient. Don't worry that the app hasn't been tested the first time. You can make the necessary changes and submit it again.
Once your app is approved, it will be available on platforms and users will be able to download it!
But you can't relax; releasing an app isn't the end of the work, it's just the beginning. The next steps include updates, improvements, and ongoing user engagement.

Conclusion and summing up
You now have a clear idea of how to build an app.
Let us summarize all the stages:
- You start by defining the project's goal and target audience.
- Then you create a plan, develop a concept and a prototype.
- Move on to design and development, where it's important to think things through to the last detail.
- After that, you test, fix bugs and prepare the application for launch.
- Finally, you post it in app stores and get your first users!
Each of these stages is an important part of successful development. The development process doesn't end with release. To keep the product relevant, you will have to constantly improve it, taking into account user feedback, and add new features.
If you ask how to develop a phone app that will be in demand, here's our answer: it's important to approach each step very carefully. This is not an easy path, but with the right strategy and support, it can be done!
Remember that it's important to work with experts regarding whether you want to launch a simple app for your company or a complex project with massive functionality. This ensures that the product is not only beautiful, but also full of all the necessary functionality.
Beetrail knows how to turn your idea into a successful product. We are engaged in turnkey development: from concept to publication and support.
Take a look at our projects and submit a request in the form below. We will be happy to discuss your needs and help you calculate the cost.
We care about your app!
Your app's success starts with the first step. Do it with confidence!
Determining the goal of the project and studying the target audience
Before you start creating an app for Android and iOS, it's important to answer the main questions:
- Why do you need a mobile app?
- What is the goal of this project?
This may see obvious, but without a clear understanding of the task, the project runs the risk of becoming useless; it will not bring your business the profit you expect to receive.
Think:
- Do you want to improve customer engagement? For example, to enable you to order your services or products through the app, not just through the website.
- Or do you want to automate the company's internal processes: reduce the time spent on solving problems, and simplify document management?
- Or maybe your goal is to enter a new market or strengthen your brand?
To determine your goal, we recommend starting with three simple steps:
- Write down your business's main problems.
- Consider how a mobile app can help you solve them.
- Assess how this will benefit your business and customers.
For example, if you're a café owner, the app might include an online menu and the ability to book tables. And if you run a logistics company, the app can automate cargo delivery and tracking.
By clearly understanding the purpose of creating an application, you will save time, money and nerves. You don't have to constantly redesign the product to meet new challenges.
The next step is to find out who you're doing this for.
It is important to understand here that the application should be useful, convenient, and should also solve the audience's real problems.
The first step — Determine who your users are.
- These could be current customers who already know about the company.
- A new audience that is just getting started with your brand.
- Company employees, if the product is focused on internal processes.
The second step — study their behavior. Ask yourself:
- What do users expect from the product?
- What pains or discomforts do they have that can be addressed?
- How do they use mobile apps? For example, do they prefer simple interfaces or, on the contrary, functional and rich ones?
To do this, you can conduct surveys, collect customer feedback, or study site and social media analytics. The more you know about your audience, the more accurately you'll be able to satisfy them.
For example, if you own a fitness club, customers might be looking for a convenient way to book workouts. Or, if you have an online store, users want easy access to the catalog and a quick purchase option. This will be easier to achieve with the application than with the site, since the user always has the phone at hand.
Understanding your audience is like a map that helps you write an app tailored to their needs. Without it, you run the risk of getting lost in the development process. Now go one step further and see what the competition has to offer.
Competitor analysis
So, we figured out the goal and the audience. Now pay attention to the competition. Analyzing competitors is like studying your neighbors: you find out what works for them and what doesn't work for them, and it's better to leave this out.
Why is this important?
Because competitors have already spent resources to understand what users need. You can learn from your successes and, most importantly, from your competitors' mistakes.
Competitor analysis:
- Download several competitors' apps.
- Explore the functionality: what they offer, how it works.
- Read reviews on the App Store and Google Play. Users often write about what they like and what they don't like.
And here's what you can find:
- It may be that registration in a competitor's app is too complicated.
- Or, on the contrary, there's a handy feature you should add as well.
- Or maybe the design isn't user-friendly — it's a chance for you to stand out!
Tip: Make a list of competitors' strengths and weaknesses. This will help you understand which chips to borrow and which ones should be avoided.
After analyzing your competitors, you will understand how to make the app better. And this is half the battle! Now it's time to move on to creating the first ideas — prototypes.
Application prototyping
So, the goal has been defined, the audience has been studied, and the competitors have been analyzed. Let's move on to the first visual step — prototyping.
What does this mean?
You create a draft version of the project (or so-called “mockups”) to see how it will look and work.
A prototype is like an artist's sketch. You are not creating the final masterpiece, but you already understand where and what will be located. For example, where to place the order button, what the menu will look like, how many blocks it will include, and what screens are needed for the application to work.
You don't have to be a designer or programmer to make a prototype. Today, doses of tools are available, such as Figma or Sketch, that help you quickly sketch an interface even without programming experience.
Here's what's important to consider during the prototyping phase:
- Simplicity. The interface should be intuitive, without overloading details.
- Logic. Consider how the user will navigate between screens. The path from opening a program to solving a problem should be as short as possible.
- Convenience. Try walking through the prototype yourself. Are you comfortable?
The prototype is not only about appearance, but also about functionality. Imagine a customer opening an app: what steps will they take? Where can you get confused? All of this can be tested at this stage.
Prototyping is a step that will save resources in the future and will allow you to test the concept in advance. Creating an app will be more efficient. It is better to fix errors at the initial stage than to rewrite the finished code later.
Looking ahead, let's share a little secret with you: you don't have to prototype the project separately for Android and separately for iOS. Create one interface, fill it with all the necessary elements, use tools that are convenient for you — all this saves time and money. Build one prototype for both platforms — and you don't have to spend money on two development teams — for Android and iOS.
Now that the prototype is ready, it's time to move on to the next stage — design.
App design
Design is a stage that turns a schematic sketch into a beautiful and functional product. This is the face of your project, what the user sees first.
Design is not only about beauty, but also about convenience. Good design makes interacting with the app easy and enjoyable. For this to work, it's important to remember a few key points.
The first — a single style. Fonts, colors, icons — everything should be in harmony. If your brand uses blue and white colors, for example, these same shades should be present in the design. This is how recognition is created.
The second — minimalism. Do not overload the screens with unnecessary elements. Remember: the user needs not only to admire the design, but also to quickly solve their problems.
Third — adaptation. Your product should look and work great on both large tablet screens and smaller smartphones.
Good design is not only beauty, but also convenience, which is especially important for successfully creating a mobile app. And now that the design is ready, you are already close to the most interesting part — the technical stage! This is where your product will turn from a mockup into a valid model.
But before that, one more important choice must be made.
The choice of technology and platform
Now that you have a clear idea of what exactly should be in your application, the crucial moment comes — choosing a technology and platform. This is a step that affects how the application will work, how fast it will develop, and how much time and resources you will spend on development.
The first thing you need to decide is what platform are you developing your mobile app for: iOS, Android, or both?
This is where development technology comes into play. If you're thinking about creating a mobile app for both platforms, consider cross-platform solutions like Flutter, React Native, or Xamarin. Choosing the right technology speeds up the creation of Android and iOS apps and reduces costs.
But if you need optimization for each platform, choose native development — separate for Android and iOS. This gives you more control over the app, but it will take longer and be more expensive to create.
It's also important to think about your future. Choose a technology that is scalable. For example, Firebase for data storage and analytics or Supabase for the backend will provide flexible and easy integration. This will help the project grow and adapt to changes.
There are many technologies that are suitable for different tasks, and it is important to choose the one that will be most effective for your project.
Don't forget about the budget and deadlines. We always recommend starting by analyzing what features the app should have and choosing a technology based on this. This will help you avoid unnecessary costs and speed up the process.
App development
So we got to the most technical stage — the development of a mobile application. This is a process where design and ideas turn into a working product.
Mobile app development considers of two key parts: the frontend and the backend. These two components work together, and each of them plays an important role.
The frontend is what the user sees and interactions with. These are buttons, screens, animations, i.e. everything that makes the product convenient and understandable. Simply put, the frontend is the “face” of your project.
But the backend is what's going on behind the scenes. This is the brain that stores data, processes requests, and sends responses. The backend is responsible for ensuring that the application is stable and fast. It supports all functions that take place “inside”.
For the app to be cheerful, user-friendly, friendly, and beautiful, it's important to choose the right technologies for both parts.
If you're wondering how to create a mobile app yourself that will run on iOS and Android, then Flutter is great for cross-platform development. This allows you to develop one program that works equally well on both platforms, saving time and resources.
When deciding which technologies to use, keep in mind that in order to have a high quality project, you need to balance both the frontend and the backend, as well as identify the appropriate tools for each part.
At this stage, it is important to work closely with developers. Discuss each step: what features should be in the first version of the project and which ones can be left for later.
Start with a minimum viable product (MVP). This is a version of the app that includes only the most important features and essential content. It's faster, cheaper, and allows you to collect first user reviews.
Development is the stage where your project comes to life. Although this is a complex process, proper planning and control will make it as effective as possible.
Testing and fixing bugs
Your app is ready. Look at it and think: Hooray, you can launch it! But don't hurry. Before you show it to the world, you need to test it.
Testing is testing development for errors, usability and reliability.
The goal is simple: make sure everything works as intended and doesn't annoy users. Here are three important points to pay attention to:
The first is functional testing. Check out all features:
- whether the user is registering;
- whether orders are shipped correctly;
- whether images are loading.
The second is testing on various devices. Smartphones are different: small, big, powerful, not so much. Your app should work equally well for everyone.
The third is load testing. What happens if, for example, a thousand users or ten thousand log in at the same time? The app should be able to cope
You can do the testing yourself or outsource it to professionals. It is important that at this stage all bugs and shortcomments are identified before the product is launched.
The main thing to remember is that testing is not a waste of time, but an investment in your product's reputation. It is better to identify problems in advance than to face negative reviews and loss of customers later.
The application has been tested, bugs have been identified, and now it's time for another important job — fixing bugs. This is the moment when all identified issues are addressed so that your product runs smoothly and smoothly.
Bugs aren't the end of the world. Don't be scared. Bug fixes are an important part of creating mobile apps. Even the most popular projects make mistakes, especially at the start. The main thing is to eliminate them in time.
Bug fixes are not just about fixing minor bugs, they are working on stability and reliability. What you should pay attention to:
- Critical bug fixes. These are bugs that can fully block the program from working. For example, the inability to register or broken buttons.
- Performance improvements. If the app is slow or takes a long time to load, this should be fixed before release.
- Minor but important improvements. These errors do not interfere with functionality, but can be annoying for users: for example, buttons are not displayed correctly or fonts do not match.
The process of correcting defects should be quick and systematic. It is important that the development team carefully checks each patch and does not create new problems in place of the old ones.
In the end, the moment comes when the bugs are fixed, and the product starts to work smoothly and stably.
Releasing the app to stores
The release of an app on Google Play and the App Store is the long-awaited moment when your hard work and efforts begin to pay off. But before you hit the Submit button, slow down a bit. There are still a few important steps to consider.
The first is preparing meta-information. You need to add a description, screenshots, a video presentation of the product, keywords. This way, users will find your product faster and immediately understand what it is about and whether it is useful for them. We also recommend that you stop using templates — be unique!
The second is setting up analytics. Before starting the project, connect data collection tools such as Google Analytics or Yandex Metrica. This will help you track user reactions and quickly respond to any issues.
The third is compliance with all requirements and standards. Each app store has its own rules, and it's important to comply with them. For example, the App Store checks whether the app complies with security, privacy, and user experience recommendations.
After the application is sent, all that remains is to wait for the test results. This may take several hours or several days, depending on the specific site and the complexity of the project. Please be patient. Don't worry that the app hasn't been tested the first time. You can make the necessary changes and submit it again.
Once your app is approved, it will be available on platforms and users will be able to download it!
But you can't relax; releasing an app isn't the end of the work, it's just the beginning. The next steps include updates, improvements, and ongoing user engagement.
Conclusion and summing up
You now have a clear idea of how to build an app.
Let us summarize all the stages:
- You start by defining the project's goal and target audience.
- Then you create a plan, develop a concept and a prototype.
- Move on to design and development, where it's important to think things through to the last detail.
- After that, you test, fix bugs and prepare the application for launch.
- Finally, you post it in app stores and get your first users!
Each of these stages is an important part of successful development. The development process doesn't end with release. To keep the product relevant, you will have to constantly improve it, taking into account user feedback, and add new features.
If you ask how to develop a phone app that will be in demand, here's our answer: it's important to approach each step very carefully. This is not an easy path, but with the right strategy and support, it can be done!
Remember that it's important to work with experts regarding whether you want to launch a simple app for your company or a complex project with massive functionality. This ensures that the product is not only beautiful, but also full of all the necessary functionality.
Beetrail knows how to turn your idea into a successful product. We are engaged in turnkey development: from concept to publication and support.
Take a look at our projects and submit a request in the form below. We will be happy to discuss your needs and help you calculate the cost.
We care about your app!
Your app's success starts with the first step. Do it with confidence!